(Topic: Sewing, holidays)

Hi Friends!
This post is later than I’d hoped… not only is this about a Christmas item that took me till early June to finish, I also had to wait to post until I gave the present to its new owner! I started this in December of 2017, for a friend who noticed that her current tree skirt was actually too small in diameter compared to the size of their tree. Since their tree is an artificial tree rather than fresh, this is an ongoing problem rather than a transient one! Well, knowing my friend and that she likes to knit but NOT sew, I figured I could fix the problem!
First I had to figure out the math (and sneakily get some measurements of their current tree skirt from her hubby!). Here are some of my diagrams and figuring:

Once I knew the circle size and how I wanted to divide it, I made a wedge pattern and added seam allowances (though I probably shouldn’t have… more on that later).
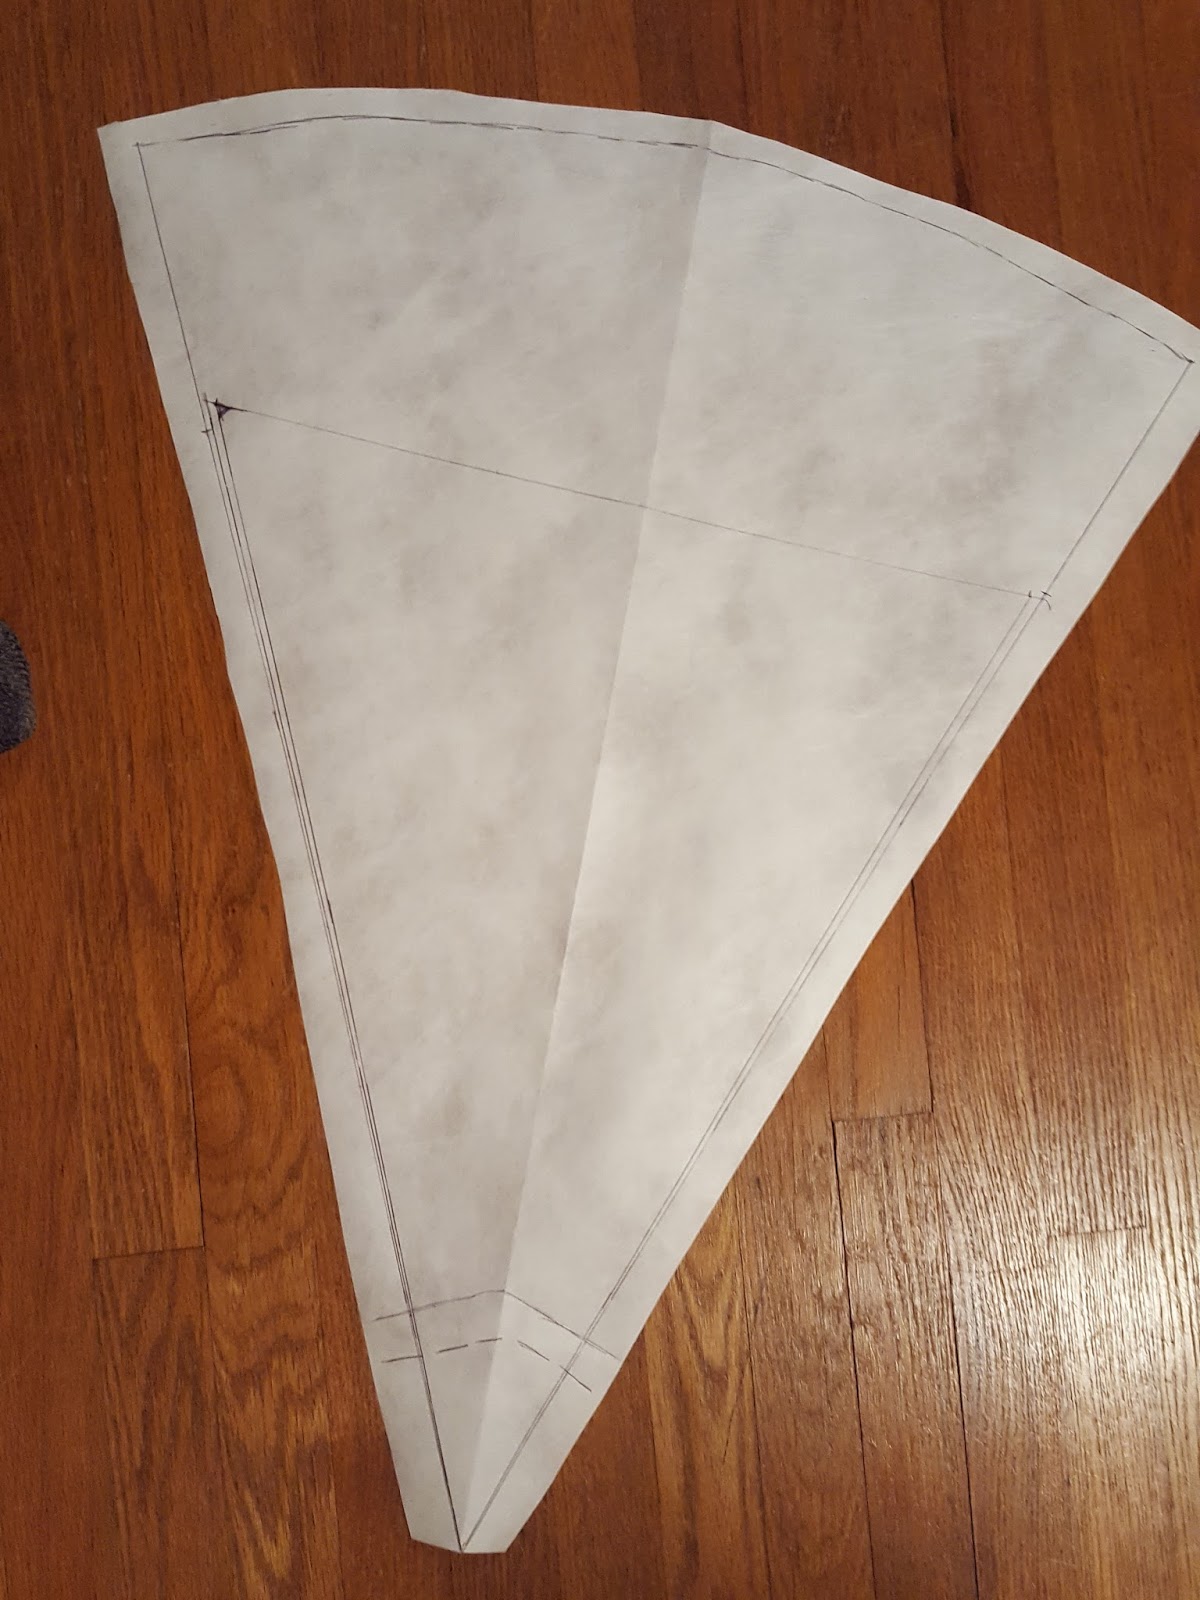
I then made notes, so I can re-use the pattern without having to re-figure everything:

And in theory, those measurements listed on the pattern piece should make it fit my friend’s tree really well this year! Cross your fingers…
Then I started picking out Christmas fabrics. I actually didn’t purchase any: I had some from another friend who has previously made a tree skirt, and some I already had it my fabric stash. I cut out 16 shapes, to make two 8-panel circles: by putting some on top and some on the bottom, I could get a nice finished effect, and have the tree skirt be reversible.
 |
| Figuring out which ones should be next to each other! |
 |
| Nearly there… I seem to have a front and back picked out, and mostly in order. |
After I figured out what was going where, it was a matter of making the batting layer, quilting (sort of), and then attaching the pieces together; finishing edges and how to connect the pieces was an aspect I hadn’t thought out yet at this point.
 |
| I used a slightly heavier fabric that I think is mostly wool as the batting. |
 |
| Here you can see the batting poking out… I didn’t think about the fact that, no matter which way I cut the pieces, at least one or both of the long edges was probably going to be on the bias (diagonal) of the fabric, and thus prone to stretching. |
 |
| Slowly getting each piece sewn together: top, batting, and bottom, sewn around the edges and down the center. That center seam is the only “quilt” aspect, but will keep the batting/wool layer from shifting too much, especially if this eventually gets washed. |
 |
| Whew! Each top/middle/bottom is now one piece. I’m keeping them in the same order on the floor and only working on one at a time, to keep the order the same and not lose my place. |
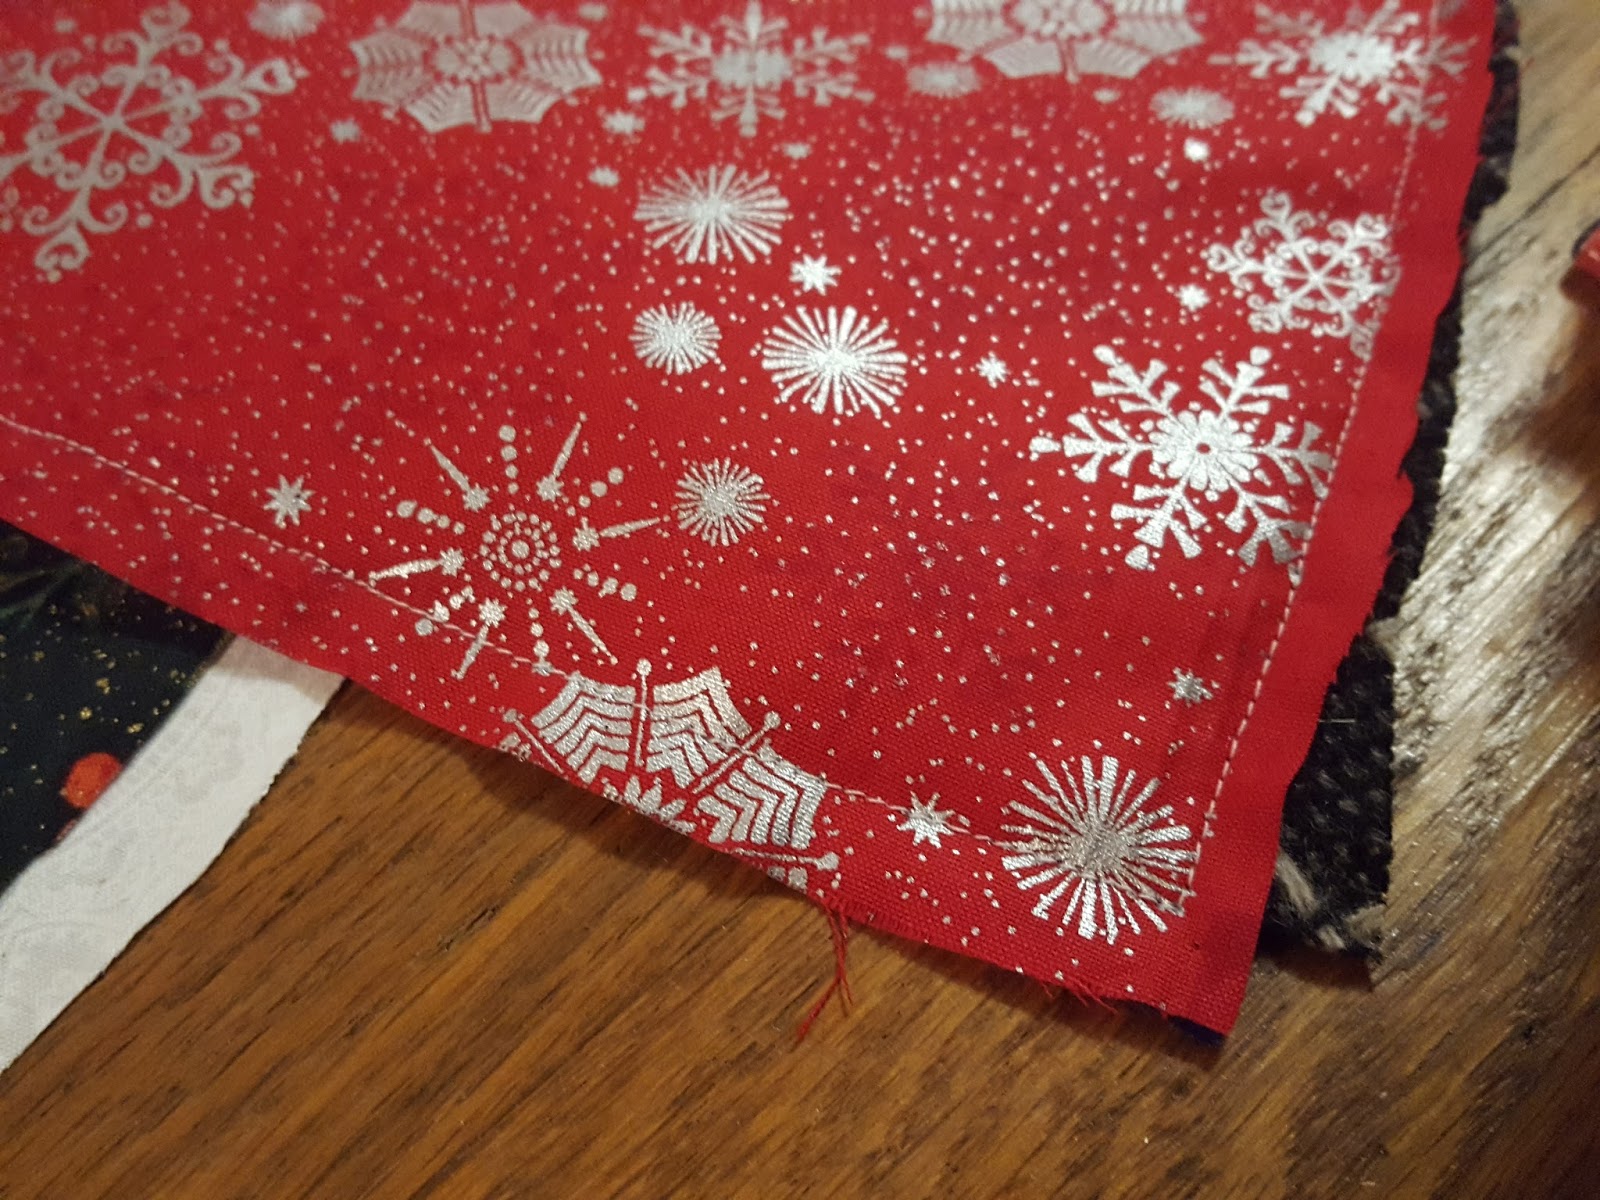
At this point I had to figure out how to finish and connect the pieces. Remember I have about a half inch on every side as seam/hem allowance, but I’m not doing hems! My pieces actually ended up slightly too large because of this. Because of the bulk of the layers, though, I didn’t really want to try to hem. So I tried a binding, which at first didn’t work because I used too narrow of a bias strip! But then I bought a 3-fold 3/4″ bias edging, which worked really well. And instead of hemming and then somehow connecting the pieces, I bias-edged, then laid one piece’s edge over the other, and sewed down the bias strip from the outside to the center of the circle. Because of the long edges being sometimes on the bias of the fabric too, this meant that some edges didn’t align perfectly, but I trimmed them before I put edging on the center hole and outside edge. Done!
 |
| Done, viewed from the red/green side. Notice slight buckling on the far side, center hole: minor enough it will not affect use, but is likely an artifact of the long sides being bias cut, so there was some stretching and warping I didn’t account for. |
 |
| Finished version, more “winter” themed side. |
 |
| Close up of the closure. This is snap tape, so all I had to do was sew the tape on, rather than each snap individually. It’s nearly invisible once closed, though it will work fine as a tree skirt if left unsnapped or if only a few are closed. |
I’m really happy with how it came out!!! It took me 6 months to do all the pieces, though admittedly I was not working on it every day. Not sure I’ll do another anytime soon, but this was fun!
Yours,
Sarah
To subscribe, find the “subscribe by email” note in the left column and enter your email there. Posts will be emailed directly to you whenever I post them!
Resource list: Visit my spreadsheet at www.tinyurl.com/infantloss